Be the first to know — Get Outpost's monthly newsletter for news, tips and job opportunities.
News
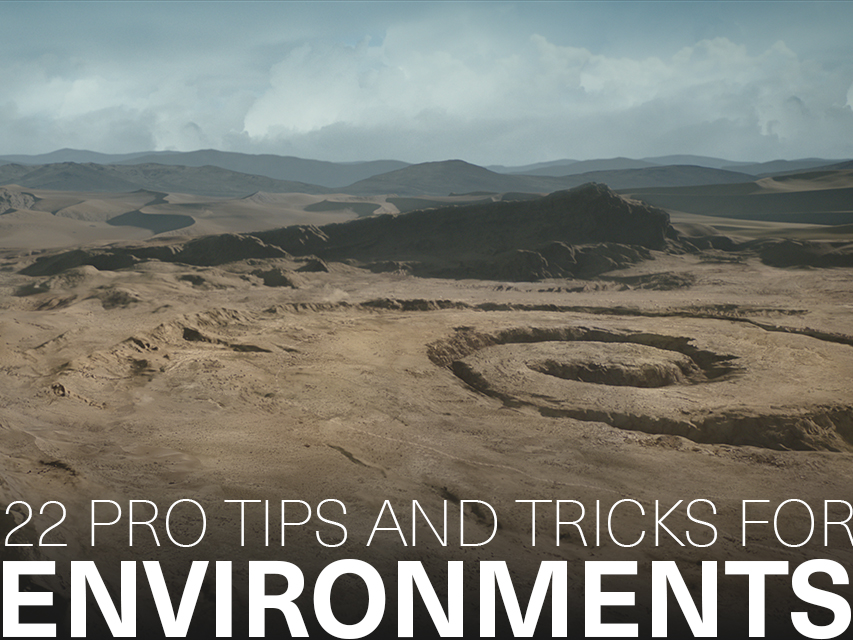
10 Pro Tips and Tricks for Hard Surface Modelling
4 May 2022
Must-see tips & tricks for Hard Surface Modelling from Outpost's talented 3D artists
We sat down with some of our 3D experts here at Outpost for their advice on Hard Surface Modelling, featuring detailed tricks using Maya, new software suggestions to improve workflow and some general tips for modelling.
A big thank you to Outpost VFX Senior Generalist Tim Gregson, Modeller Michal Bonczyk, and Lead Generalist Nick White for sharing their top tips for Hard Surface Modelling.
Join the team! Look at our current vacancies for global opportunities
1. Block out your scene
It's a good idea to block everything out to begin with. Even just with cubes, cylinders, and spheres. Get a feel for the scale of what you are modelling and understand the 3D space that the model occupies. This is particularly useful if you are modelling something that will feature moving parts as it means you can check that it will work. Concept artists will come up with cool looking designs, but you need to make sure they are physically capable of working.
2. Reference
Finding references is super important. Research into your subject matter, find out how your model would be built in the real world. You can also try asking the concept artist what references they used – you may find things you never would’ve thought of.
3. Composition
Consider how your model will be viewed. You may not have shot cameras, but you can mock a few up. This ties in well with blocking out a scene and if you are using basic shapes, it can stop you getting bogged down/distracted by details. This is particularly useful if you are modelling an environment as you can start to think about scale cues; things that will be seen up close and replicated in the distance. It also allows you to work out your level of detail.
4. Bevel Edges
Unless you are modelling something especially far away, a good practice is to bevel edges. Nothing in the real world has a perfectly sharp edge, so try not to bevel things equally. These edges will pick up on specular pings at render time, so you may want to think about where and how sharply an edge would transition. This tip is more for mechanical or man-made objects, but the principal is the same for organic modelling objects like rocks and cliffs. Think about where erosion may soften things off.
5. UV as you go
This can be a massive time saver. Once you are adding more shape to your blocked-in model do a quick UV. It's likely that you'll be re-using parts of your model. If the UV seams are cut now, when you’re at a lower resolution, that will feed into your higher-res model. Most of the time you just need to unfold and pack UVs later, rather than cut all the seams on a high-poly model.
6. Think about topology
You may not be modelling a character, but you still need to think about topology. Keep it clean. This will help with your UV seams too.
7. Make it look cool
It's the ultimate brief. It can depend on timescale, but anything that is interesting and looks cool will sell your model. You may have been provided a concept, but there is always some ambiguity. Don't go too far off brief but remember you're an artist; make some artistic decisions.
8. Use the right software
It's worth thinking about the software you use. Different software has different tools that can speed up your workflow. Use the right tool for the right job, be it Maya, ZBrush or Houdini, or a mix of them. Anything that can speed up your process is worth doing.
9. Some useful tricks for Maya
9a: To quickly add even bevels to a mesh using Maya you can go to Mesh Display > Soften/Harden Edges and using a value like 30°set objects normal. Then you can select all hard edges using Select > Use Constraints
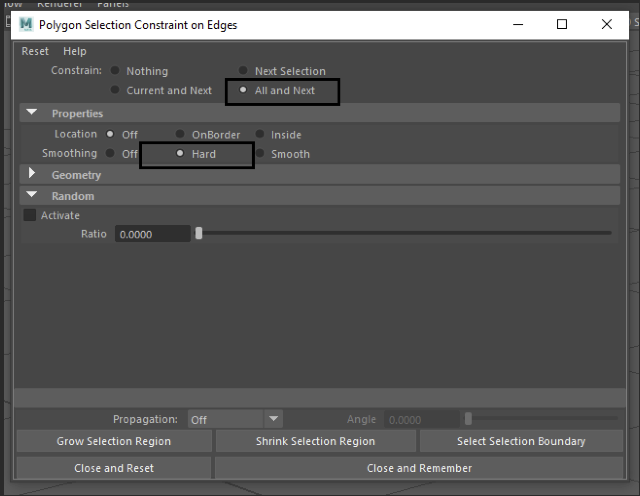
You can see the effect below:
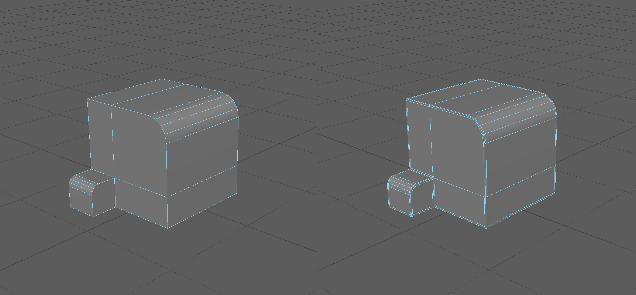
To speed up the process even more you can add Maya shelf shortcuts or use a script like Modlt to fully automate the process.
9b: Never use the Bevel tool in Maya in Chamfer mode for hard edges. It will make any modifications more difficult. If you decide to remove support edges that were created using Chamfer mode, you will lose overall volume of your mesh.
There is also a higher risk of smoothing artifacts so use Chamfer mode only when the curvature is obvious. This is especially true while working using subD workflow.
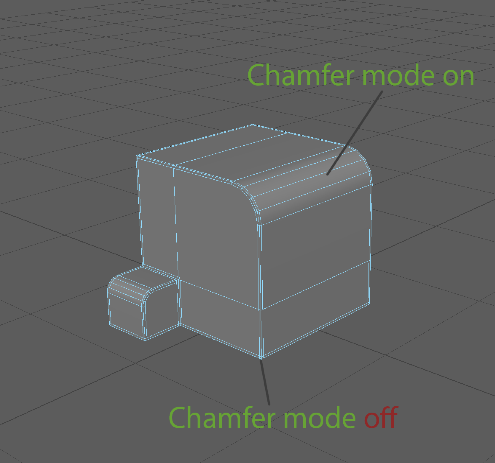
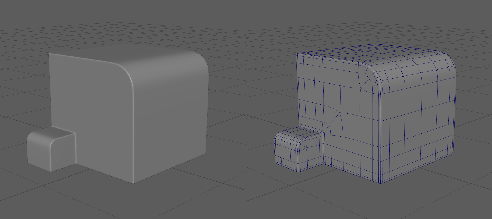
9c: You can also use bevel with Chamfer mode off for non subD workflow when the edges are very sharp, or the object will be seen at a distance.
One extra step that is required is smoothing all the object normals using Mesh Display > Soften Edge. The object’s overall shape will not be altered but you will get an illusion of round corners thanks to the normal smoothing. The effect is like Arnold Round Corners or V-ray edgeTex but baked into the model.

Notice the black outline effect so use this technique wisely. It gets less apparent when the edges get sharper, or the viewing distance increases.
9d: While modelling using subD workflow always add additional support edges for proper geometry and UV smoothing. This step can be omitted if the mesh is very dense, or you don’t like the person texturing your model…
9e: Adding details on curved surfaces and maintaining good topology can be difficult so you can help yourself by duplicating your base mesh before the detailing. If you change the overall shape too much or run into any smoothing problems than you can always project a new mesh onto your base mesh using Deform > Shrink Wrap.
10. Have you tried Fusion 360?
Fusion 360 is a 3D modelling/CAD software that has a parametric modelling workflow, which is great for quickly designing hard-surface models, where you can dial in precise dimensions and keep a non-destructive workflow. If you’re used to modelling in Maya, this software will be great to use as you don’t need to worry about topology or the other restrictions that poly modelling can bring at times. This can be quicker and more flexible for concepting/building certain hard-surface models.
This software is great for building 3D models of robots, machines, guns, or other props, especially if you’re aiming for a sci-fi look with intricate details.