Be the first to know — Get Outpost's monthly newsletter for news, tips and job opportunities.
Ideas
18 Pro Tips and Tricks for CG Lighting
9 February 2022
Unmissable tips & tricks for CG Lighters straight from the wonderful minds of our resident Lighting and Lookdev artists
However, luckily for us we have a wealth of experienced, talented and diligent CG lighters to go to for time-saving, practical lighting and workflow advice that comes from a deep understanding of the craft.
So whether you’re a lighting veteran or new to lighting, below are 18 of our best tips and tricks for lighting artists from our resident CG lighters.
A massive thank you to Outpost VFX Supervisor Sheen Yap, Senior Lighting / Lookdev Artist Jamie Stewart, Lighting / Lookdev Artists Cynthia Soza and Jeff Shank for sharing their very best CG lighting tips.
If you'd like to join our talented lighting team, take a look at our current vacancies for global opportunities.
1. Get as much information regarding your plate lighting as possible
The more you know about how your plate was lit, the easier it will be for you to match it in your scene. If you’re lucky, you’ll have some grey and chrome light ball references, a Macbeth chart and HDRI data from the set. If you’re really lucky, you’ll have some info on set lighting via scan or witness cam, maybe even light types that were used.
All this information is valuable, so take the time to study it. It will give you strong understanding of the set, indicating the size of the light sources, the positions of the lights and blockers which will give you a good starting point for setting up your lighting scene. Don't be shy to ask your leads or supervisors if you are unable to find the data. Quite often due to the big file sizes, this material is not always uploaded but will live in a dedicated folder on disk.
If you’re unlucky, however, you’ll just have the plate. This is where it’s important to have some knowledge of cinematography.
2. Always use a reference
Whether you’re senior or junior, take a few moments to collect references before starting a shot. This is so important, but maybe even more so if your shot is full-CG.
3. Replicate what is happening in real life
For live action features, the goal is to get the CG elements to integrate seamlessly with the rest of the plate. Replicating how the lighting was done in real life will bring you better and faster results when integrating your CG elements.
Questions to ask yourself:
• Where are the light sources coming from? Are they far or close to the subject?
• What type of light sources are they? Is it a big soft box (area light) or a hot outdoor sun (directional lights) or a spotlight?
• Are the set lights moving throughout the shot? For example, are they on a moving rig or crane, etc.
• Where are the c-stands placed and are there blockers, diffusers or bounce cards attached to them?
• Study the shadows in the plate. For example, if the actor has a very long sharp shadow it's an indication that the light source is very low, small, and strong. If the actor has a very soft and short shadow, the light source is probably higher, bigger, and more diffuse.
4. The HDRI
For both live action and full CG shots, a good HDRI will be your best friend. It provides ambient lighting so that you don't have to place multiple bounce cards or fill lights. For shots with reflective surfaces, it can provide cheap highlights and reflections. It can also set the mood of the scene from being cloudy and gloomy to cheerful and sunny. Extracting light maps from the HDRI also gives you dynamic range and texture to use for area lights, spotlights, etc. which usually gives better results than assigning a constant colour.
Pay attention to the details. Take the time to paint out or neutralize anything in the HDRI that might contribute to the scene. For example, the crew members standing off to the side wearing bright red t-shirts or a bright yellow trailer van might not seem like a big deal but paying extra attention to cleaning up your HDRI will save you the headache down the line when you are trying to figure out why your scene has an odd red or yellow tint.
A good trick for grading HDRI is to colour pick an area in your HDRI image and find the corresponding area in the plate and begin matching the RGB and exposure values. For example, there is a Macbeth chart placed on the floor in both the HDRI and plate. In Nuke with two viewers side by side, aim for your selected areas to both have the same RGB values and luminance values. After all, a digital image is made up of pixel values, so why not use that to our advantage.
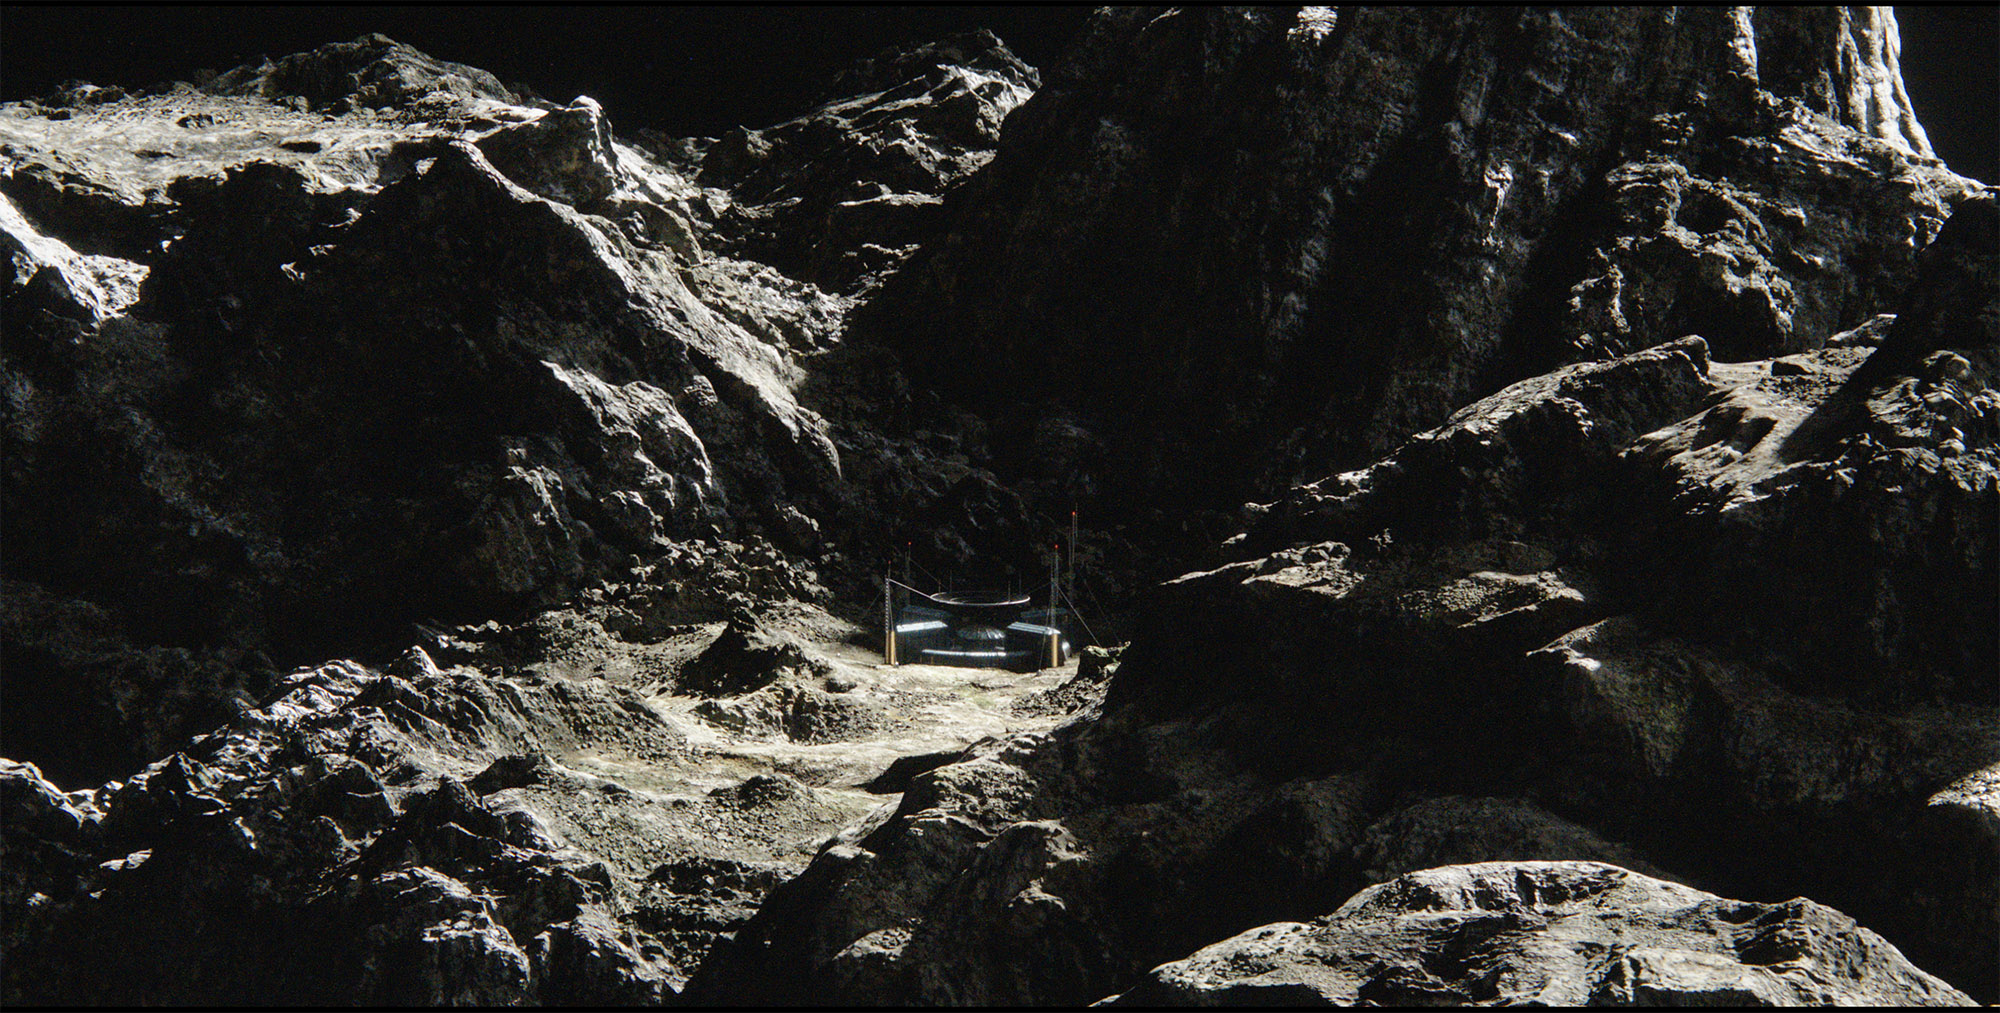
CG Lighting for an entirely CG environment in Foundation
5. Start Simple
Start simple: stitch and grade your HDRI as accurately as you possibly can. A really good HDRI stitch provides a strong foundation and can bring your lighting setup 75% of the way there. Place your CG ref balls in 3D space matching that of the on-set reference image (ideally use the orientation of the matchmoved camera, LIDAR, and witness camera studies to find the correct location).
Once you have your CG ref balls matching your on-set plate ref balls in terms of colour and exposure, then go ahead with extracting the main light sources first (Key and Fill). Keep it simple. You want to avoid having a lot of different lights in your scene that are a duplicate of each other or have little to no contribution. The compositors will also appreciate this!
6. Observe real world lighting, photography and cinematography
Lighting is subjective. What might appear beautiful to one person, may not necessarily have the same appeal to another. Gather references (either found online or shot with a DSLR / phone, etc.) and put together mood boards and reference contact sheets. This will not only help you explain your vision for the mood of the shot but also get a better feeling and direction of what the supervisors are trying to achieve.
Study of cinematography and shot composition can be useful too. It can help with ideas on how to set a mood for a shot to portray a sad or happy scene. You can also use lights to draw your eye to a certain part of the screen for hero characters, etc.
Photography is also important. I would highly recommend lighters to pick up / borrow a camera and just play around with capturing images using different apertures, focal lengths, shutter speeds, etc. The process of bringing your photo into Lightroom or Photoshop is also a great study to know what a little bit of contrast or grading can do to your work.
Observe and take notes on how objects appear at different times of the day (sunrise, high afternoon sun, golden hours and night time) and in different locations (indoor vs outdoor).
7. Don’t neglect the theory
A really great CG lighter will be fluent in both practice and theory. Outpost Senior Lighter, Jamie Stewart, recommends In Praise of Shadows by Jun'ichiro Tanizaki, an essay that examines the delicate and nuanced interplay between light, shadow and space. In his words: “reading this book will make you feel like a lighting ninja.”
8. Learn the difference between realism and photo-realism.
This one’s aimed at new artists as it’s a great place to start. It’s important that you learn the difference between realism and photo-realism. Almost everything you light will have to match something that has been pre-lit in a very un-natural way either in a studio or on a lot.
9. Keep your scenes organised
Lighting is a department that handles different 3D data from multiple departments (Matchmove, Layout, Environments, Animation, CFX, FX) and outputs it in 2D data for the Compositors.
Most of the time elements from the upstream 3D departments won't arrive at the same time. This can often get messy quickly if you are not on top of which version of the animation, CFX, FX or environment you have in your scene. Keep your 3D and 2D scenes clean. Depending on the software try and utilise labelling dots, labelled back drops, notes and clearly named render passes to avoid mistakes.
10. Learn to isolate and debug issues – your team will thank you for it
As the lighting department has to deal with so many different departments, try to debug and isolate where the issue is coming from first before flagging upstream.
• Try to debug which department the issue is coming from.
• Be specific. The more information you can provide, the quicker it will be for everyone to solve the problem.
• Make witness camera dailies, provide an example scene file or open the scene and run through the issue with the next department to highlight the issues efficiently.
• Always be kind and polite. We're all humans and doing our best to create an amazing final image as team.
11. Work with the artists either side of you
Learn about the disciplines either side of yours. For example, learn about composition and modelling / texturing. Models and textures and all their intricate secrets will likely be the things that challenge you the most. Knowing what’s causing a problem will best inform you about whom to send your shot back for fixing… Just as comp will do to you if you send broken / incomplete / nasty renders.
The best thing to do is to get a slapcomp going ASAP and ask the compositor how they are going to use the lighting passes you provide. Spend a day in their shoes – one day will be enough.
12. Keep your naming conventions conventional
Keep light select / passes naming conventions simple. Remember, once it gets to comp, this is the name you’ll be sticking to. Changing the name on the next team can cause their scripts to break and start a bit of confusion on both sides.
Lighter Jeff Shank gives us some more naming convention advice: “I like to keep my render passes lower case such as “ball_red_bty” instead of Ball_Red_Bty because keeping track of upper and lower case can be surprisingly frustrating at times. In this example, you want any ball pass to list alphabetically by object instead of their color. ball_red_bty, ball_blue_bty, ball_yellow_bty is easier to follow than blue_ball_bty, red_ball_bty, yellow_ball_bty.
“Also, try to maintain continuity with your naming standards across all shots in a show. I misspelled a pass name recently, but I left it alone knowing that the compositor’s files would be looking for future versions of that same pass with that same misspelled name. Correcting the spelling after renders are in play would have caused confusion.”
13. Navigate like a pro
If migrating from Maya to Houdini, you may be overwhelmed by the different sections of the software. Navigating is made easier if you press the ‘n’ key while your mouse is over the network window, this will open a ‘radial menu’ not unlike the Maya marking menu. Use this to jump between different contexts. There are other radial menus for you to use in the viewport.
14. Turn ‘auto-convert textures to TX’ off
In Arnold, start your film with auto-convert textures to TX off so if it is passed on it won’t cause any trouble for the next artist or the render farm.
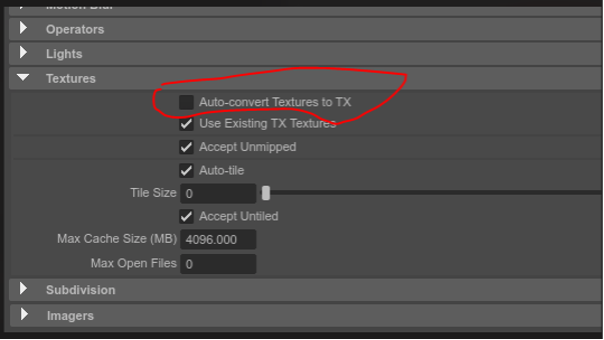
Turn off 'auto-convert textures to TX' in Arnold
15. Keep copies local
It’s a great idea to save copies of things you may need in the future to a home folder on your local drive. Why? Your hard-earned shot setups will eventually get backed up and taken offline. All your brilliant ideas, standard setups and things you may need later will be gone. Examples would include Render Settings, Render Setup Templates, Presets and AOVs. These would usually be saved from your Maya sessions as .json files. Trust us, you will forget things down the road, and you’ll be glad you saved local reference files (outside of the shot tree structure) for the future you.
16. Stay organised in your render setup (Maya)
It’s important to keep your Render Setup area organised. There are no set rules on how to do this, but Lighter Jeff Shank tells us how he organises his: “think of your Render Setup area as a written outline of what you’re trying to render. I keep collections separated by type such as lights, geometry, FX, CFX, LIDAR and characters, even if they don’t have edits and adjustments underneath. Your collection title bars would be named accordingly – this is one of the few areas I like to use all capital letters because it’s just easier for me to see them!”
Don’t forget, other users may need to follow what you’re doing in the Render Setup. If you streamline this area too much, the next user may not be able to decipher what your intent without poking and selecting everything for verification. The less others have to verify your setup, the better you did at keeping things well organised.
17. Know when to “Merge” and when to “Overwrite” (Maya)
If you have a set of light AOVs that you want to import into a current scene, be sure to check the “Merge” box on the “Import AOVs” screen or your handy dandy light AOVs will overwrite the AOVs you already have in the scene file.
18. And finally, some quick-fire parting wisdom:
• Optimize your scene and render times where you can. It will enable you to address feedback quicker and turn shots around. As mentioned, lighting is subjective.
• Don't be afraid to provide wedge tests of different exposures, colours, etc. This will help you get feedback and answers quicker on where to take the shot.
• Sometimes rendering locally is heavy / time consuming and sometimes the farm is too busy. Instead of waiting, use the time to try a 2D approach either by relighting in nuke, do mockups or paint overs on your renders in 2D to explore concepts.
• Analyse your image with fresh eyes. Zoom in and out, mirror the image, expose it up and down and step away from your screen. It's very easy to get stuck in a loop, usually seeing an image in a different way may help solve your problems.
• Most importantly... have fun and never stop learning!