Be the first to know — Get Outpost's monthly newsletter for news, tips and job opportunities.

Interviews
Star Trek: Picard S3: The Construction - and Destruction - of a Borg Cube
23 May 2023

We sit down with the talented artists who brought the menacing Borg Cube of Star Trek: Picard S3 to the screen in this roundtable
Instead, the episodes are packed full of epic space battles, vengeful enemies, and new alien spaceships which simultaneously bring a fresh feel to the Star Trek franchise while managing to evoke a strong sense of nostalgia.
Outpost were excited to work on a variety of sequences across all episodes of season 3, including a reintroduction to one of the oldest and most feared entities of the galaxy: the Borg.
Utilising an encyclopaedic knowledge of Star Trek shows that came before, our LA and Mumbai teams set to work on developing the biggest Borg cube yet – with a view to destroy it later in the series.
We sat down with Environment Artist Maeve Eydmann, 3D Generalist Ian Matta, FX Artist Mike Zhou, Lead Compositor Mick Reid, and Show TD Sean Myers who talk us through the process from construction to destruction.
Can you start by telling us how the team developed the Borg cube for Star Trek: Picard Season 3?
Environments Artist Maeve Eydmann: The Borg cube has had several iterations. The challenge we faced was to create the ‘ultimate’ Borg cube – bigger than any we’ve seen previously.
Initially we had some concept art to work from, so the team began working directly in 3D. I took over the asset build from FX Artist Jenny Moorehead; she had already blocked out the main shapes of the cube in Houdini and had begun the epic task of adding all the greebles. I then refined the smaller details and brought the model to completion.
Using the Borg cube seen in season 2 as our style guide, we had to work out a way to make something that was over ten times bigger. When you’re in the emptiness of space, you don’t have anything else comparatively to communicate scale, so you have to rely on the details of the object itself.
Breaking up the silhouette with antennae, ravines and bright lights helped show scale at a distance. As the camera moves closer, the details of the greebles are seen and then finally the tiny neon lights of the interior workings of the cube are seen up close to give a sense of the inner spaces of the cube, which reinforces its planetary scale.

The first sighting of the biggest Borg cube in the Star Trek canon for Picard S3
Not long after being introduced to the cube, we see the Enterprise flying alongside its surface in an all-out attack. How did the showrunner want this shot to look and feel and how did it progress?
3D Generalist Ian Matta: Coming onto the shot we were really going for that complex, chaotic, epic battle feeling. The look of this shot was directly influenced by the Borg cube battle scene from Star Trek: First Contact. The push was to get the feeling and elements of that battle back for 2023 with a modern polish on it, while remaining loyal to the older material.
We were given some previs from the client that provided us with a great jumping off point, though some small tweaks were needed as the shot progressed.
The biggest consideration when approaching FX here was how the environment would interact with the explosions. Proxy geo of the Borg Cube antennae, the Enterprise, and the shield were passed to FX to be used in the sim. [FX Artist] Mike Zhou is an absolute FX wizard and handled all of the volumetric FX in this shot and handed back a VDB cache. From here I was mostly balancing the overall density of the volume, and the temperature attribute in the volume shader until we got that perfect balance of fire and smoke during the strafing run.
The whole shot was a very Yin-Yang type collaboration between 2D and 3D with the sheer amount of elements we had to take into account and keep track of.
I can’t even quite recall how many render layers there were, as most elements were broken up to reduce render times on small iterations and also provide the control that comp needed. I cannot stress enough the skill and eye for detail that these artists [Compositors Jeannie Ben-Hain, Linda Kim, and Tom Heddell] have; they truly are the ones who brought this shot across the finish line.
There’s a lot of quintessential Star Trek elements happening here: photon torpedoes, phasers, the Enterprise’s shield. How were these developed?
IM: Every element had thought put into it; from the Borg lasers, to the warming up motion of the Enterprise’s phaser. The Borg lasers themselves took a bit of effort to align with the fire location and tracked contact points on the shield.
A large part of getting these elements to final from the 3D side of things was providing locators and AOVs to the compositing team. Linda Kim worked on the Borg elements, while Jeannie Ben-Hain handled the Enterprise elements and engineered the shield rippling effect.
In order to really get the epic scale of the Borg cube, I ended up using three cube surfaces in a row. In total, we rendered about 75 kilometres of Borg cube surface along with a rough estimate of 3,000 lights per cube side. To quote Show TD Sean Myers: “IT’S A LOT OF LIGHTS.”
This sequence is closely followed by the full destruction of the Borg cube. What was the creative process for this shot?
FX Artist Mike Zhou: We began with previs from the client of pretty much everything in the shot and what they were asking for. It was fairly simple; it looked like a couple of ping pong balls exploding outwards from the cube which cause it to break apart. There were a couple of fireballs shooting out from the cube too so from that we had a pretty clear idea on what they were asking for in terms of beats and story.
Once we had these initial conversations we started with layout, using the Borg cube and Enterprise assets we already had worked up from previous sequences. We then looked at how the explosion would happen. I knew that the main story point was the ship escaping, so I didn’t want the explosion to go overboard.
From a technical point of view, how did you approach the cube destruction?
MZ: We knew when we were constructing the cube that we would later be destroying it, so Maeve and the team that made the Borg cube created the debris so that we were able to destroy it before we did anything else with it.
In my mind, the explosion is more like a core explosion that forces the cube to break apart. The explosions that happen during the breakage trigger something inside, rather than the Enterprise attack causing the full breaking of the cube.
There was a lot of back and forth on how to get this to work the way we wanted it to, but with this core explosion idea in mind I created internal forces inside the cube to try to break it apart. In Houdini you can introduce random force, so we tried that initially. We wanted it to radiate outward, not just distort, so I added a collision object within the core that pushes outwards.
Everything became too heavy to calculate so once the initial shape and expansion of the explosion was made up from the collision object, I then turned it into a velocity field which relied on telling the pieces individually where they should be going. That way I could see roughly the trajectory of the bits of debris and how much force should be behind it. Then I applied it to a noise to get a really fast iteration of how each piece was moving before I replaced it with the hi-res parts.
We also had velocity fields on the explosions themselves that affected the breaking up of the planet too.
This process let me use Houdini simulations to get the gist of it, but also art direct a little so that we had more control and weren’t just relying on one long simulation. With the collision object simulation, I got an understanding of the explosion, applied it and then the rest was just a secondary simulation of how it breaks apart.
Where in this shot did you utilise 2D?
Lead Compositor Mick Reid: We have Jupiter that is in the lower left frame, that was done with DMP for some previous shots. Then [VFX Supervisor] Chris Faczek did some lookdev on the cube when we got the renders in from those guys, just to dial in the look of what we wanted for this sequence in terms of directional lighting.
The major part that I was doing was adding in a lot of smaller 2D explosions to fill in any gaps that the CG explosion may have left open, just to fill it out and make it feel like there were lots of little pockets happening.
The challenge for 2D on this one was communicating the sheer size of the cube and the explosion. We needed to find 2D elements that would behave similarly to how the CG was in terms of speed and how fast it would expand but a lot of these 2D elements are shot on set so they’re not that big compared to the Borg cube. It was mixing together what is ‘correct’ and physically possible in the real world, and what just looks cool, and then dialling in the fire intensity.
How did other departments handle the challenge of communicating the scale of the explosion?
MZ: Speed was a big element for this shot. I don’t know the exact dimensions of the Borg cube but in comparison to the Enterprise it’s enormous. The Enterprise looks like a tiny ant coming out of it.
You can’t play it too safe by setting it to nuclear explosion scale because it would be too small, so we had to cheat it and just feel for the right scale. We tried different speed variations and tested them to get the basic speed of the explosion and luckily the previs ping pong visualisation helped with this as it included some timing cues.
The details of the explosion also needed to be a certain size to feel the giganticness of this shot so we tried to slow it right down without stopping completely. It didn’t make sense for it to explode out instantly like a real explosion. Chris and I went back and forth on this, and he would say “okay this is the scale and the speed we’re looking for, now we have to make everything else in the shot relative.”
There were times when it felt too big because there were too many explosions coming together; an explosion would trigger another if they were within a certain distance of one another, and so it exponentially gets bigger. Through experimenting, I would put say 15 small explosions in one area and they would become one big one, and that’s how we got some cool beats on some of the main destruction areas that expand.

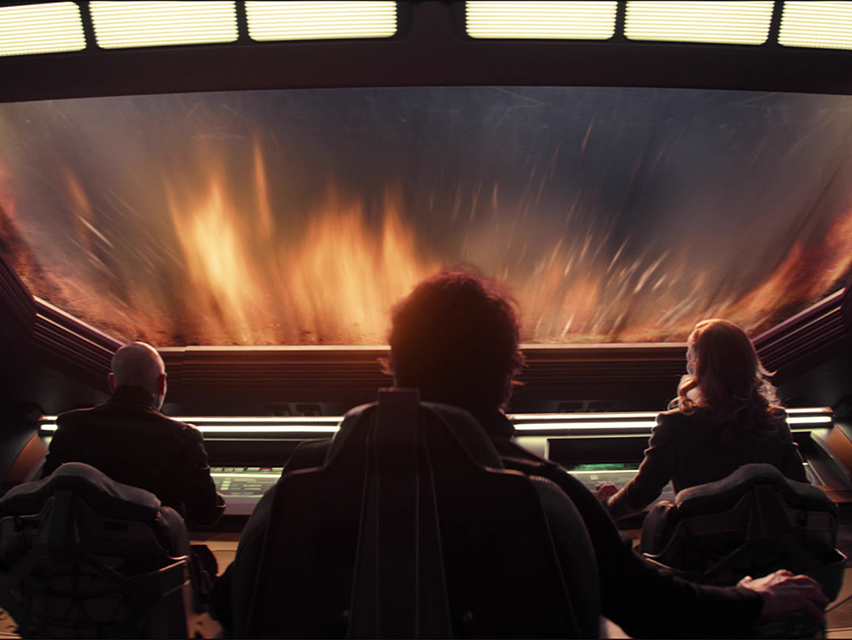
The Titan in front of the Borg Cube helps to communicate the size of the asset
What was the process behind the lighting in this shot?
Show TD Sean Myers: The lighting on the cube was not specific to this shot, but getting that process down was a little bit difficult because of the sheer number of lights and so just being able to manage that quickly became important.
Houdini is great at scattering things, but you can’t really connect those scatters to light, so we wrote a bridge to scatter some points and then turn every point into a light. This light point then had an area of influence. Once we had that down we could just cache out each light side and then beyond that it was really restricting our sampling and light bounce budget to be precise.
Then for the fire lighting, when we were dialling in the shader, I was mostly trying to get the internal scattering right and match the light that Mike had done when he was playblasting his explosions. I wanted to get the same general lighting just so the client wasn’t surprised when they saw the rendered explosion.
The biggest challenge from this point of view was rendering the influence of the explosions on the cube; the occlusion and shadowing of the cube and the fire light was what was time consuming. The only technique we used to mitigate this was the volumes that were used to cast the indirect light were a much lower voxel density than the ones we actually rendered.
Watch the team’s work on the final season of Star Trek: Picard on Paramount+ today.


