Be the first to know — Get Outpost's monthly newsletter for news, tips and job opportunities.
Ideas
Star Trek Picard S2: Creating the La Sirena Ship Crash
29 July 2022
Take a closer look at the La Sirena ship crash of Picard season 2 with this detailed deep-dive from Outpost's LA FX, 3D and 2D teams
Picard season 2 is a more intimate exploration of the Star Trek universe as Captain Picard is taken back to his family chateau after crash landing in the year 2024. Outpost’s work spans across multiple episodes, ranging from complex FX work to day-to-night scenes to full-CG environment work.
One of the more challenging sequences the Outpost VFX team undertook was the La Sirena ship crash of episode three. Outpost LA’s FX Artist Mike Zhou, 3D Lead Daniel Kumiega, and Compositors Donna Camargo and Mick Reid reveal the finer details that went into creating this pivotal scene.
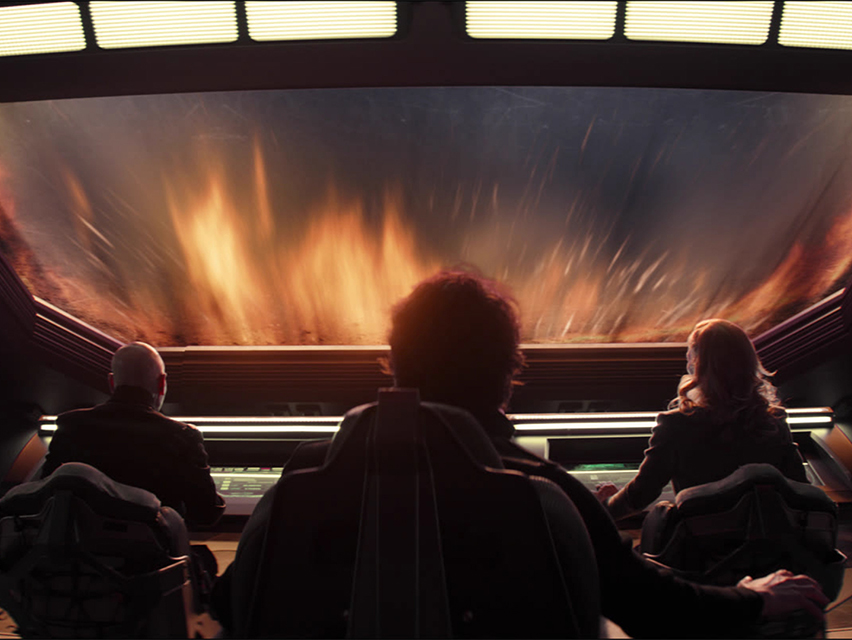
The sequence begins with an internal shot of the ship as it crashes into the Picard estate. For this, the team started with mostly 2D elements and began by focusing on the development of the windshield: “We wanted to make it feel more like there was something between us and the exterior of the ship, so we started with scratches and burn marks on the screen and built that up to a place where we were happy with it,” says Reid.
“We then began experimenting with 2D sparks and flames across the windshield as the ship comes through the atmosphere but in the end with the environment added in, we decided to incorporate a mix of 2D and FX, bringing in FX plasma fire and mixing with 2D fire elements that were sped up and streaked out across the screen. We added 2D sparks in at the end,” Reid continues.
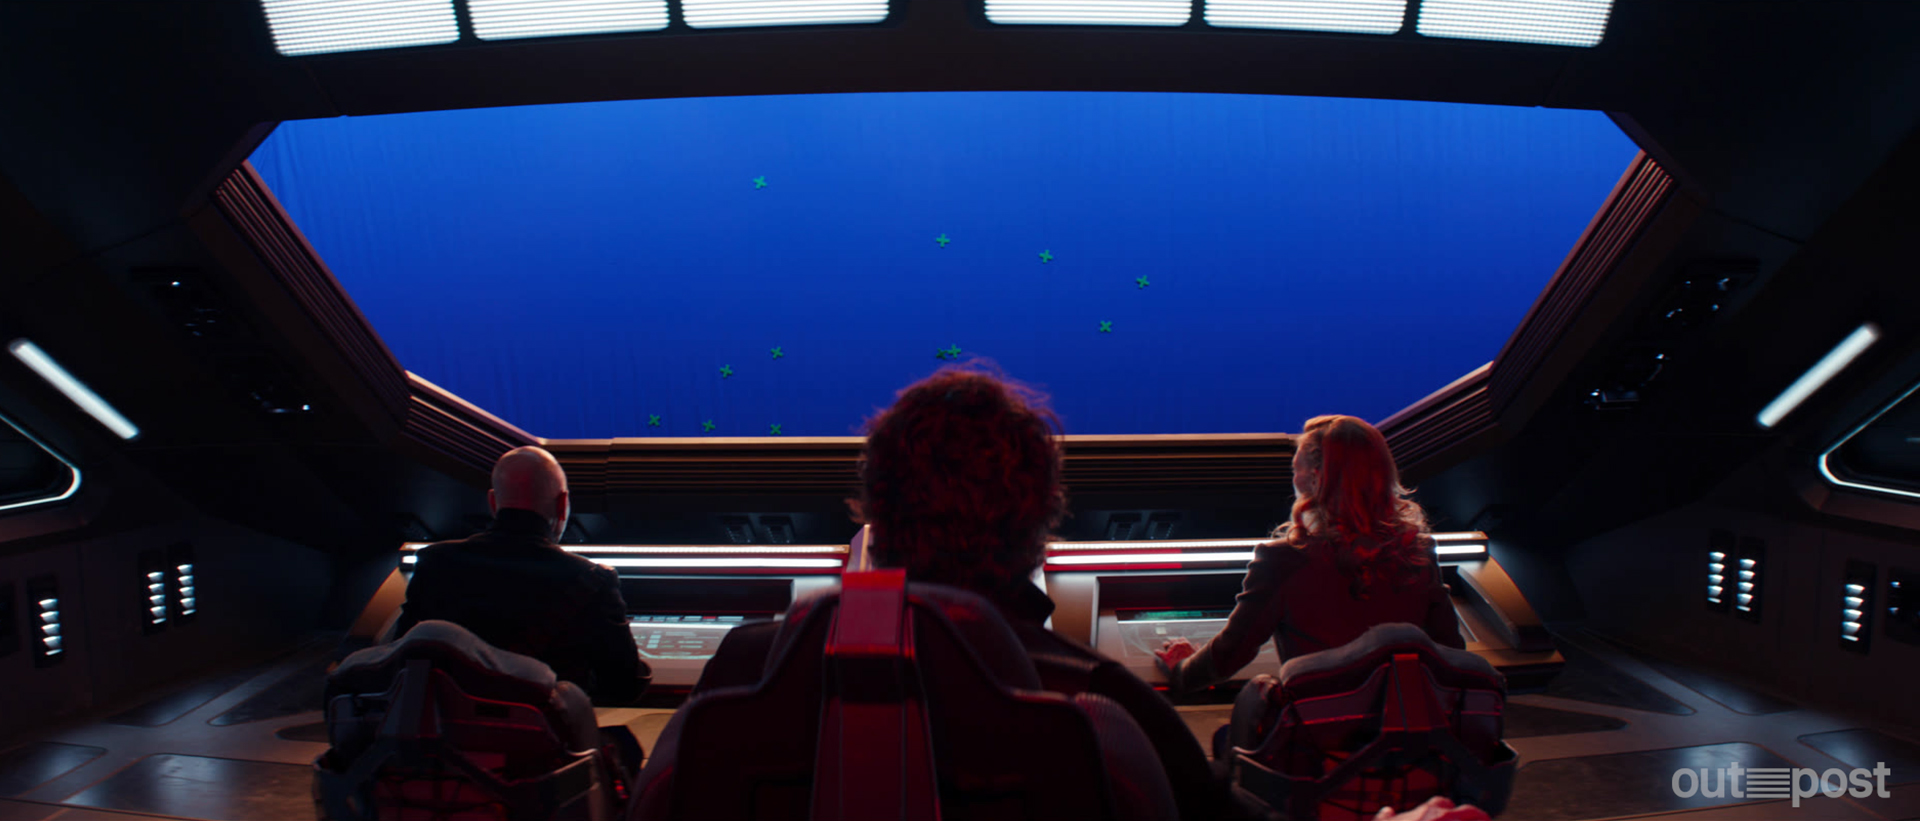
Plate of ship entering the Earth's atmosphere
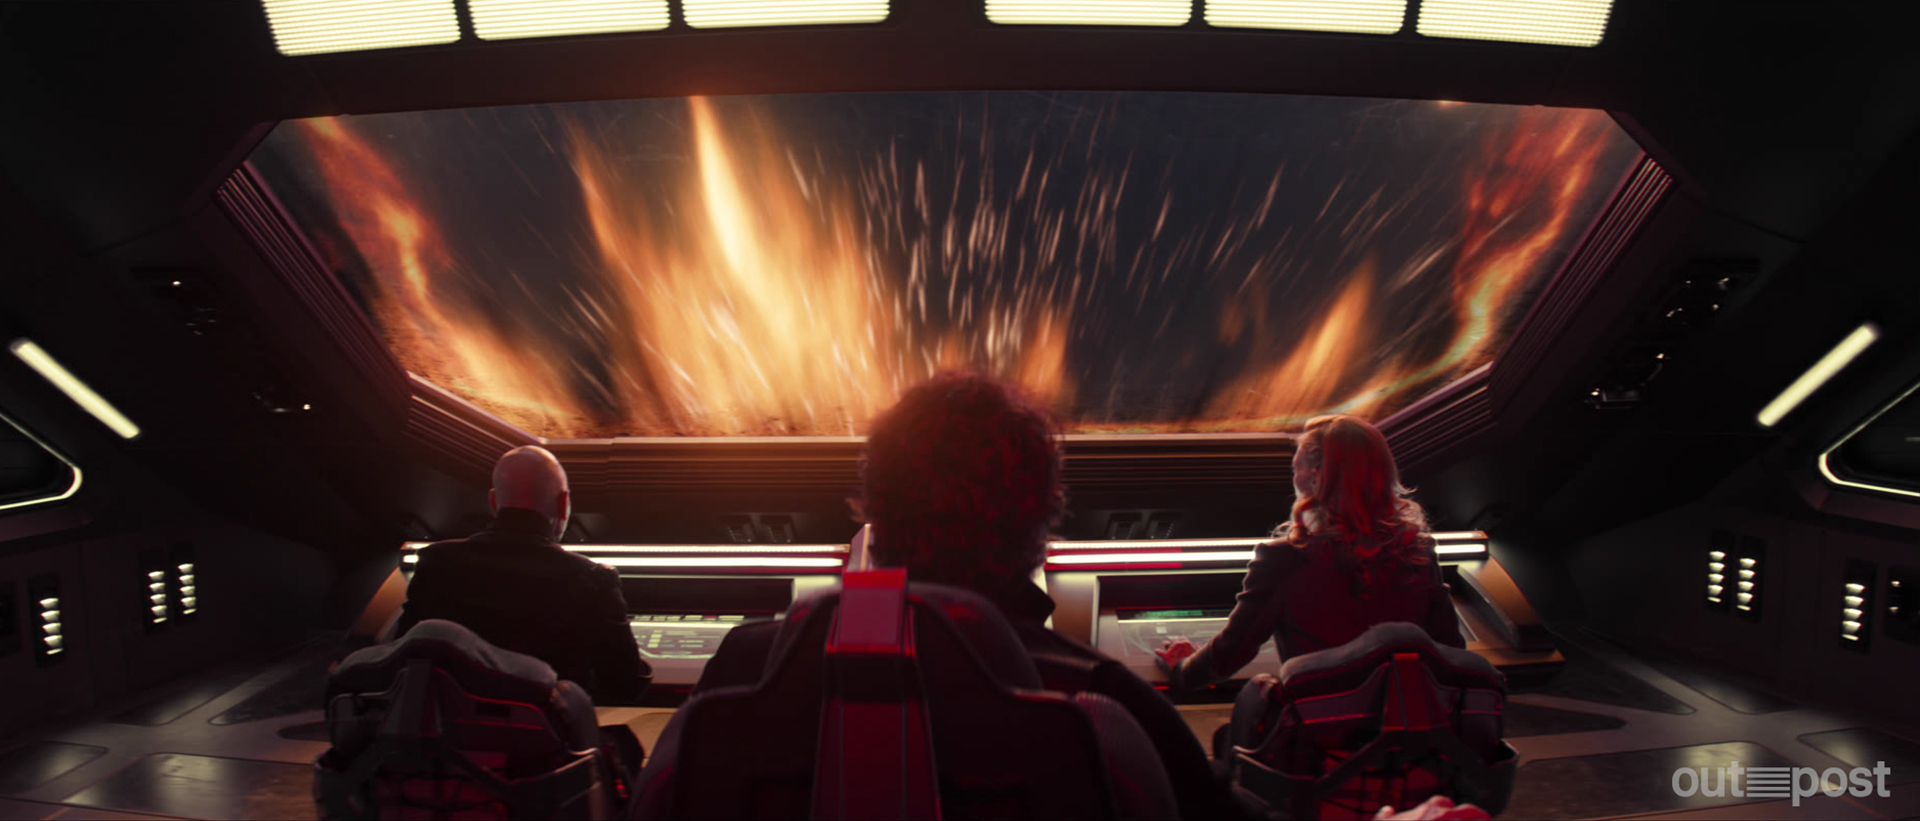
Final shot of ship entering the atmosphere, complete with 2D and 3D flames and plasma
Outpost FX Artist, Mike Zhou, was tasked with developing the 3D fire across the ship’s windshield, taking to references on YouTube for inspiration. “I spent some time looking at space tests to see how plasma was generated and what high pressure and intense heat did to its colour,” Zhou explains.
“I thought about the shape of the flames, how far it disperses, what colour it is when it’s hotter or cooler, as well as what kind of atmosphere they are going through and how that interacts with the air. We didn’t want to create something that’s really new or unfamiliar; we wanted it to look futuristic, but still plausible. The idea that they could be using new materials in the future gave us flexibility to implement new and different characteristics of the fire as it breaks through the atmosphere, but the references ensured we stayed somewhat grounded in reality."
As the FX team were working on the fire and atmosphere for the windshield, Outpost’s Environment Artist Daniel Kumiega was working on the layout for the full sequence. “We didn’t have the layout of the environment locked down at this point, so I started on building this out while the FX work was going on. I began working on the other two shots of this sequence as these are more beauty shots where you can see more of the environment, and wherever these shots ended up, we put that back into the big FX shot by coming back around and updating it.
“For this entire sequence, I did the lookdev, lighting and layout all at the same time, which is the way I like to work to really try and paint a picture. I had to think about night for screens because it’s not so much a like-for-like as it is an illustration of what night really is; if you look at a photograph of the night, it wouldn’t be very interesting.
“So, I had to think: what kind of night do we want? When you look at cinema, nights are very different across the board, so trying to come up with something that is believable, yet interesting while not going too far into the cartoon world, can be challenging. There was a little of back and forth on that for this shot,” says Kumiega.
“The colours, the brightness, how much you’ll see in the shadows of this shot – that evolved in tandem with what the 3D team was doing, especially with the trees and even with the elements on the windshield,” adds Reid.
As this was being finalised, Zhou worked on the simulation of the crash, once again bending reality to create something that is recognisable on screen. Of the creative challenge, he says: “In terms of the speed, we had to cheat physics a little bit because of how fast the ship was going. In the simulation world, you won’t be able to see anything in such a short amount of time, so no simulation will give you results similar to what we ended up with.
“In the end, I moved the ship into position in the centre of the scene and then added the wobbling effects around it. Making the clouds and atmosphere move past the ship’s window is far easier than making the ship move through it because you can control it far better. This is a solution used a lot with fast-moving objects in VFX; unless the object is moving slow enough that you can increase up in steps to capture each frame, you’re never going to see much with a physics-based sim.”
The second, and perhaps most dramatic shot in this sequence, shows the La Sirena ship as it comes through the trees and hits the ground. Zhou explains how the team began with such a challenging simulation: “Before starting, we once again looked at some real-world references of explosions or impacts and we started to focus on what it was about these videos that sold the scale. One thing that leapt out to us was the speed at which things travel and I found when creating the sim that if I felt it didn’t look right, I needed to slow it down to make the ship look bigger.”
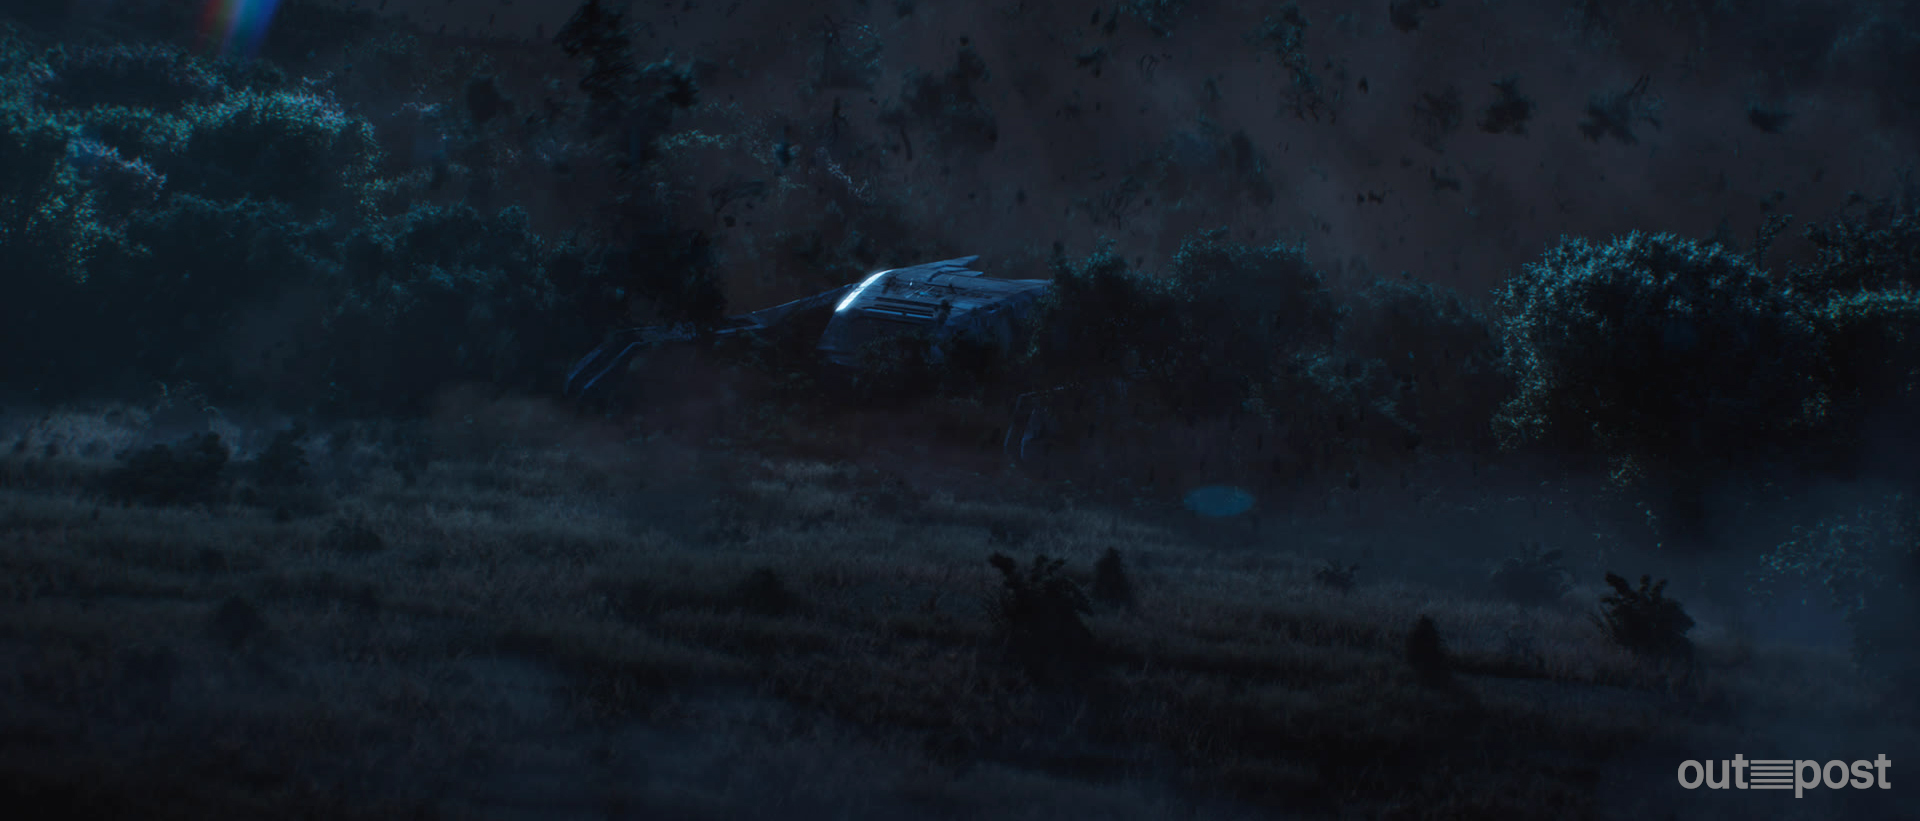
A still of the FX sim of the La Sirena crashing into Picard's vineyard
On creating believable scale, Kumiega adds: “The La Sirena ship is really large, so to tell that story is very challenging. The level of detail that went into the dust and atmosphere and all the other layers, if you were to take those layers out, you would definitely feel as though something was missing and that the scale was off. All those particles – the small, medium, and large – are super important to help sell it.”
“We had to create a lot of references within the shot,” remarks Zhou, “for example, the ship is big, but how big is it in reference to the trees? The trees are also big, and so in order to sell the scale you have to look at it all and how it interacts with one another.”
The ship simulation went through many iterations to find the right balance of speed, impact, and interaction with the surrounding materials. “In the beginning, we thought we didn’t need dust because it was supposed to be wet dirt in the forest, but when we had put the simulation in the shot it didn’t look as we’d thought it would, so we added a dust pass and it immediately felt much bigger,” recalls Zhou.
Scale wasn’t the only challenge the team faced on this shot, however, as Zhou explains: “Daniel and I made some trees which I could use for the simulation so I could start experimenting with different methodologies to see how best to break the trees and to see how it would move with the wind, how the leaves would fall and what that would look like.
“Once I’d got the sim to where I wanted it, I’d put it into the shot and immediately we knew it wasn’t right; the ship would cause the trees to fly way too high into the air because of the power in the collision. At first every tree flew up into the air, almost like a scene from The Matrix. It didn’t seem to matter what I did to the sim; it was just because of how fast it was going, and the force was too much to slow it down. So there were a lot of iterations here to make it look less like a firework.
“Instead of using a vellum simulation which is a position-based dynamic approach, I used a more traditional workflow using rigid bodies which meant they could turn into fractured pieces rather than bending. This allowed me to give the limbs of the tree limits which, if surpassed and the trees flexed too far, they would break. If they didn’t break, the sim allowed them to bounce back. This worked better in a full forest sim because there are a lot of elements and trees there which needed to interact with the ship. I had to also keyframe some animations here to slow down the collision velocity, especially in the Y axis.
“For the trees that only needed to interact with the air displacement around the ship, I used the ship as a centre point which meant that we could update the animation and the sim would still work. I simulated the trees which would remain intact using the vellum simulation which gave the trees a slight sway as it reacts to the drag force of the ship crash. By doing two different sims here, I was able to have more control over both to achieve the right kind of movement.
Introducing the 2D elements to the shot, Reid worked alongside Outpost Compositor Donna Camargo to bring all the elements together. “In this shot, the client wanted to emphasise the moment the ship hit the ground,” recalls Reid, “and so we added in a couple of our own 2D elements to initiate the impact at the beginning and draw the eye to that point.
“A lot of our work was selling the environment, so we gently hazed out a lot of the environment in the distance but kept the silhouettes of the hilltops way in the back. We also added elements close to the camera, for example clouds and fog, which again helped to sell the environment and support the scale.”
Being a night-time shot, getting the atmosphere’s light levels and tone was also a challenge, yet an important aspect to get right. “From a comp perspective, there was a lot of trying to dial in a lot of atmospheric elements such as dust so that it was visible at night but maintained its earthy characteristic,” adds Camargo, “so we had to walk a fine line between earthy and cooler tones, trying to get a consistent feel of atmosphere layer between both this shot and the shot after.”
“The client wanted to keep some colour and light range in there, too, so we were sure to keep a good amount of detail in the shot,” adds Reid.
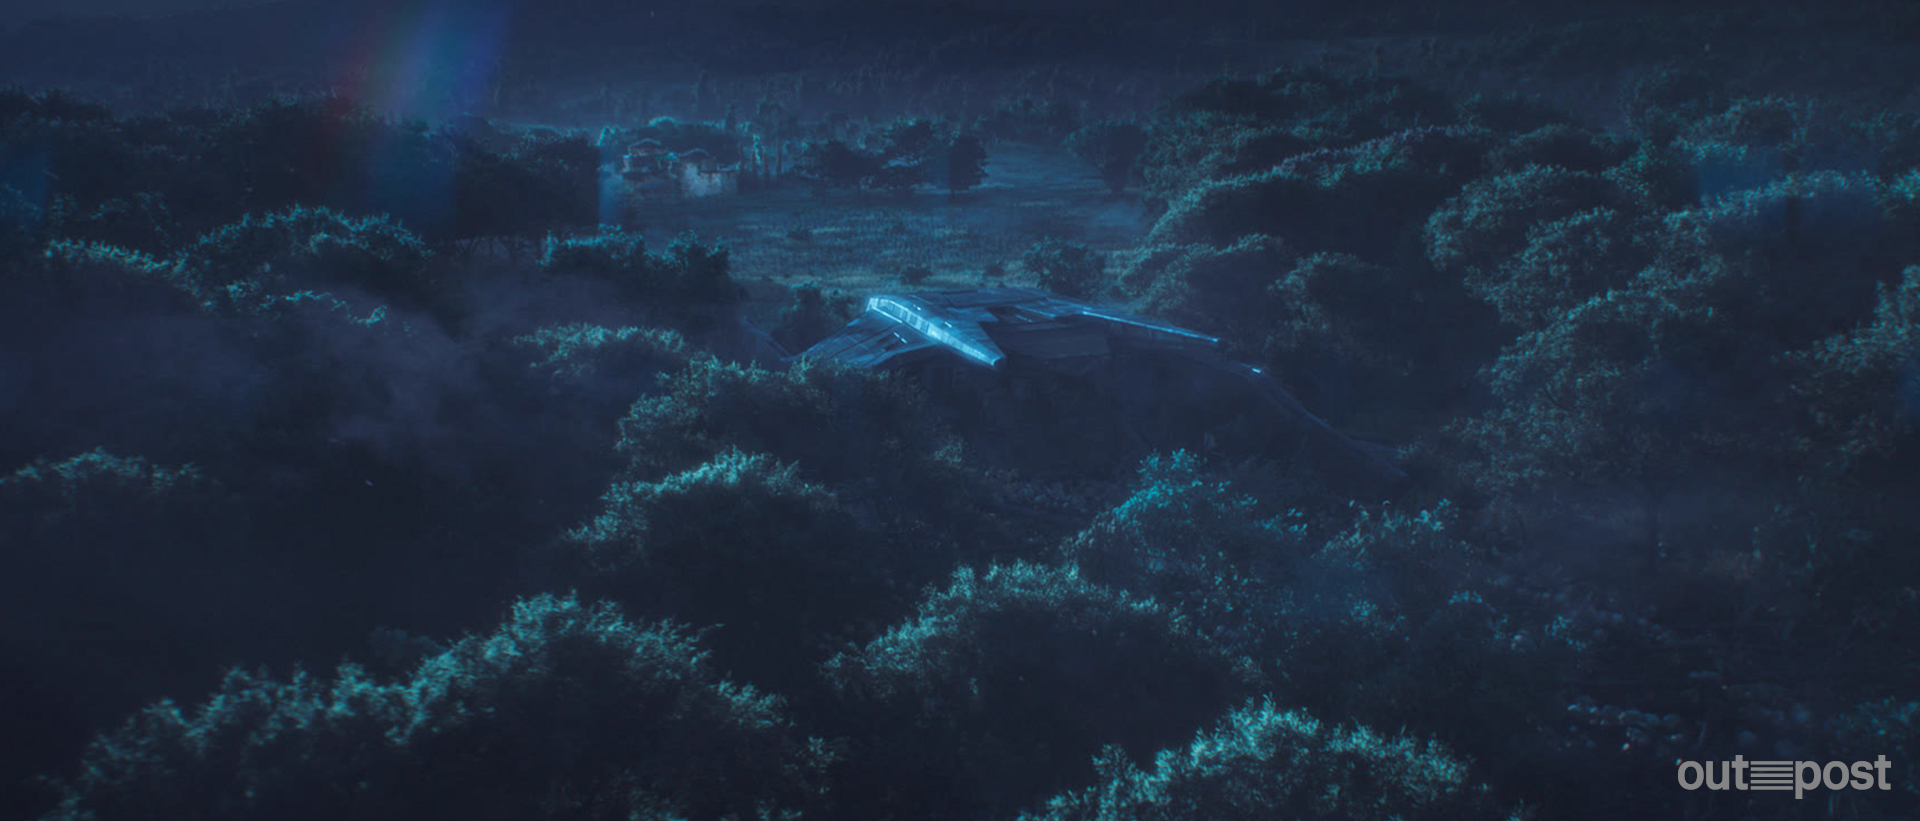
A cinematic night shot of the ship after its entry to Earth
The team were able to work efficiently on this sequence after receiving the pre-vis from the client which helped when it came to the creation of the final shot of the three; “the pre-vis we got from the client was actually two separate animations, so we created this all into one, reanimating it and stringing it together,” Kumiega recalls. “This meant that Mike’s work could span across the two shots which I would then give different camera angles so as to look like two separate shots. This helped the overall process and continuity of the environment and the animation.
“Mike was able to simulate everything a little bit longer than the length of the two shots, which meant we had some room to play with and we kind of got a two for one. However, there were some custom elements that had to go into each shot to really bring it home. For example, there was some more layout work in the final shot of the sequence because we see more of the ground versus the opposite angle, so I had to up the detail here but because we had already nailed down the look at this point, it came together pretty quickly.
“There was also a bit more back and forth on this shot for the camera movement as the clients wanted the track and lenses a little different,” he concludes.
Camargo discusses the comp challenges that this final shot caused: “Similar to the previous shot, the tricky part for comp here was the dust; we spent a lot of time fine tuning and trying to reach the right thickness and volume. It ended up being trial and error between 2D and 3D elements to get the dust to sit right.”
“I remember we ended up doing the same simulated element but lit two ways to really get the right density,” adds Kumiega, “we had one really dense set rim lit by the light and one that was more diffused.”
“We ended up blending them together a little bit,” Camargo says. “We also added the lens flares and floaties; Mick came up with a great way of bringing in the floaties that added some cinematic atmosphere. And of course, the fog – we spent a lot of time on the fog trying to get that right, too!”
The Outpost team used Houdini to create all of these FX, Maya for environment, layout and lighting with Arnold for instance geo and Speed Tree to generate assets. Nuke was used for compositing, and NukeX for particles.
Watch the team’s FX work in season 2 of Star Trek: Picard, streaming now on Paramount+.


